Discord has established itself as a powerful tool, with strong tools for community creation, real-time communication, and much more. Discord provides an exciting environment for developers to create custom bots, integrate applications, and expand server functionality via the Discord Developer Portal. This Discord Developer Portal guide is specifically designed for Chrome users, ensuring that you can easily browse and fully utilize the Developer Portal.
A Quick Overview of Discord and the Discord Developer Portal.
Discord began as a gaming platform, but it has now expanded to serve a diverse spectrum of communities, including computer enthusiasts, academics, hobbyists, and professional organizations. The Discord Developer Portal is a must-have tool for anyone wishing to create bots or integrate applications with Discord, as it provides APIs, libraries, and extensive documentation.
Why Use Chrome for the Discord Developer Portal?
Chrome is one of the most popular web browsers, known for its speed, reliability, and extensive library of chrome extensions. Using Chrome for accessing the Discord Developer Portal offers several benefits:
- Performance: Chrome’s optimized performance ensures that the Developer Portal runs smoothly.
- Extensions: Various Chrome extensions can aid in development, such as JSON viewers, API testers, and more.
- Developer Tools: Chrome’s built-in developer tools are robust and user-friendly, making debugging and development more efficient.
Getting Started with the Discord Developer Portal
Creating a Discord Developer Account
Before diving into the Developer Portal, you need to set up a Discord developer account. Here’s how:
- Visit the Discord Developer Portal: Go to the Discord Developer Portal site and click on “Log In” in the top right corner.
- Create or Log In to Your Account: If you don’t already have a Discord account, you’ll need to create one. Follow the prompts to set up your profile.
- Access Developer Tools: Once logged in, you’ll have access to the developer tools and can start creating applications.
Navigating the Discord Developer Portal
Upon logging into the Developer Portal, you’ll find several key sections designed to help you manage your applications and bots:
- Applications: This is where you create and manage your applications. Each application represents a bot or integration.
- Teams: If you’re working with others, you can create or join a team to collaborate on applications.
- Docs: Access comprehensive documentation that covers APIs, libraries, and usage guidelines.
- Resources: Find libraries, community forums, and other resources to aid your development process.
Creating Your First Application
Creating an application on Discord is straightforward. Follow these steps:
- Navigate to the Applications Tab: Click on “New Application” to start.
- Enter Application Details: Provide a name and description for your application. This information will be visible to users who interact with your bot.
- Set Up a Bot: Under the “Bot” section, click “Add Bot” to create a bot for your application. This bot will be able to join servers and interact with users.
Setting Up and Testing Your Bot
Once your bot is created, you need to set it up and test its functionalities. Here’s how:
- Token Generation: In the “Bot” section, you’ll find a token. This token is essential for your bot to communicate with Discord servers. Keep it secure.
- Permissions: Set the necessary permissions for your bot. This includes permissions like sending messages, reading messages, and managing roles.
- Invite the Bot to a Server: Generate an OAuth2 URL to invite your bot to a server. Under the “OAuth2” section, select the “bot” scope and the necessary permissions, then copy the generated URL and use it to invite your bot.
Developing Your Bot
With your bot set up and invited to a server, it’s time to start development. There are several popular libraries to help you get started, including:
- discord.js: A powerful library for interacting with the Discord API.
- discord.py: A Python library for creating Discord bots.
- Eris: An alternative to discord.js with a focus on performance.
Example: Setting Up a Basic Bot Using discord.js
Here’s a simple example to get you started with discord.js:
const { Client, Intents } = require('discord.js');

const client = new Client({ intents: [Intents.FLAGS.GUILDS, Intents.FLAGS.GUILD_MESSAGES] });
client.once(‘ready’, () => {
console.log(`Logged in as ${client.user.tag}!`);
});
client.on(‘messageCreate’, message => {
if (message.content === ‘!ping’) {
message.channel.send(‘Pong!’);
}
});
client.login(‘your-bot-token’);
Replace 'your-bot-token' with your actual bot token from the Developer Portal.
Debugging and Testing
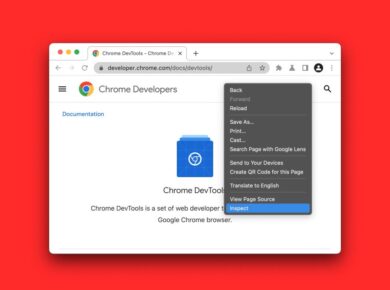
Testing your bot is crucial to ensure it performs as expected. Chrome’s developer tools can be highly useful for this purpose. Here are some tips:
- Console Logs: Use
console.log()statements to debug your bot’s behavior. - Network Tab: Monitor API requests to ensure they are being sent and received correctly.
- Extensions: Utilize Chrome extensions like Postman to test API endpoints.
Publishing Your Bot
Once you’re satisfied with your bot’s functionality, you can make it available to other users:
- Public Bot: In the Developer Portal, enable the “Public Bot” option under the “Bot” section if you want others to be able to invite your bot.
- Verification: For bots in over 100 servers, Discord requires verification. Follow the verification process in the Developer Portal to get your bot verified.
Optimizing for Success
Creating a bot is just the beginning. To ensure your bot’s success, consider these optimization tips:
- SEO for Bots: Just like websites, bots can benefit from SEO. Use relevant keywords in your bot’s description and commands to improve visibility.
- User Feedback: Encourage users to provide feedback and regularly update your bot based on their suggestions.
- Promote Your Bot: Use social media, forums, and other platforms to promote your bot and attract users.
Troubleshooting Common Issues
Even with careful planning, you may encounter issues. Here are some common problems and their solutions:
- Bot Not Responding: Ensure your bot is online and the token is correct.
- Permission Errors: Check that your bot has the necessary permissions in the server.
- API Rate Limits: Be mindful of Discord’s rate limits to avoid being temporarily banned.
Resources and Support
For further assistance, Discord provides a wealth of resources:
- Discord Developer Documentation: Comprehensive guides and tutorials.
- Discord API GitHub: Access the API documentation and examples.
- Developer Forums: Connect with other developers and share experiences.
Conclusion
The Discord Developer Portal is a powerful tool that opens up a world of possibilities for developers. By following this guide, Chrome users can efficiently navigate and utilize the portal to create and manage their own Discord bots and applications. Remember to stay updated with the latest trends and continuously improve your bot to keep your audience engaged.
Read Also:
Chrome Developer Tools for Web Development – Complete Guide
